Are you running a bakery and struggling to keep your ingredients fresh and organized? Or maybe you’re planning a new bakery and want to ensure your storage solutions are top-notch from day one? A walk-in cooler designed specifically for bakery needs can transform your workflow, improve food safety, and boost efficiency. In this article, we’ll dive into everything you need to know about building, upgrading, or renovating a walk-in cooler for your bakery business. From choosing the right size and features to installation tips and maintenance, get ready to become an expert in bakery refrigeration.
Understanding the Importance of a Walk-In Cooler in a Bakery

Having a dedicated walk-in cooler in your bakery isn’t just a luxury—it’s a necessity. Fresh ingredients like dairy, eggs, butter, and perishable doughs require proper temperature control to stay in optimal condition. Without a reliable cooling system, you risk spoilage, food safety violations, and wasted financial resources.
A well-designed walk-in cooler allows you to store large quantities of ingredients efficiently, organize your inventory for quick access, and maintain consistent storage temperatures. This not only improves workflow but also enhances the quality of your baked goods, ensuring your customers always get the best possible products.
Key Features to Consider When Choosing or Renovating a Bakery Walk-In Cooler
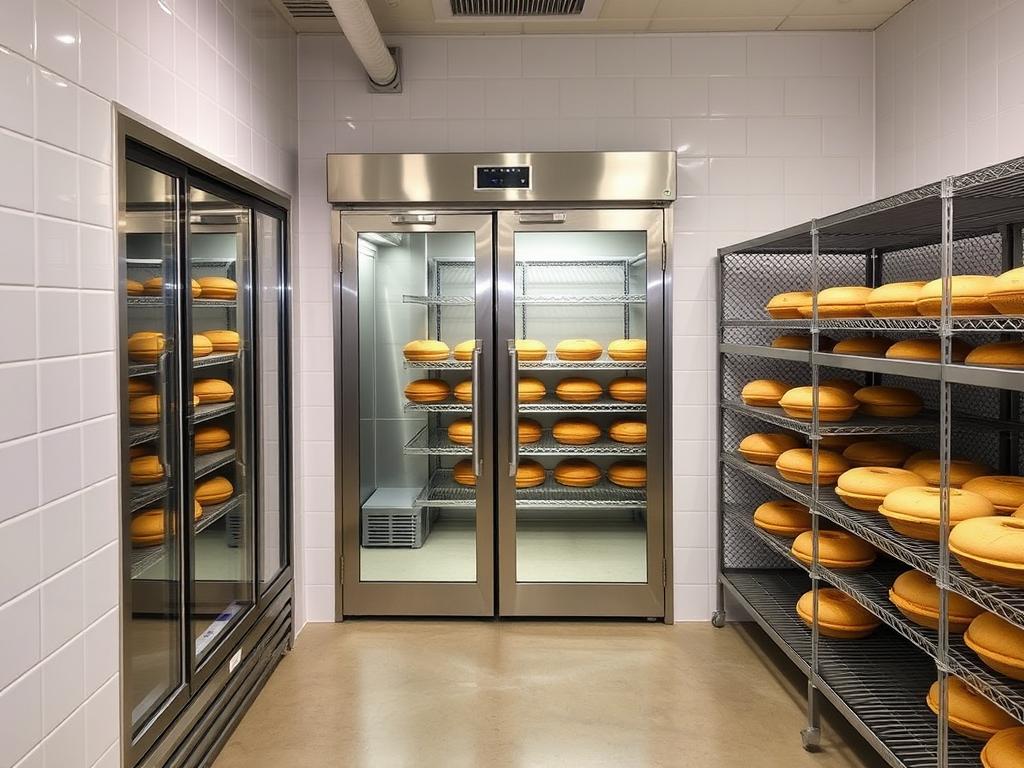
When planning your bakery’s walk-in cooler, it’s important to consider several vital features that will make your storage both effective and efficient. Let’s look at some critical factors:
Size and Capacity
The size of your walk-in cooler should match your bakery’s operational scale. Think about your current inventory needs and future growth. Typically, bakeries require a cooler that can hold:
- Perishable ingredients such as dairy, eggs, and fresh produce
- Prepared doughs and fillings
- Finished baked products awaiting sale or display
A good rule of thumb is to choose a capacity that provides some room for expansion but doesn’t take up excessive space. Common sizes range from 8×8 feet to 12×12 feet, but larger bakeries might need even more room.
Temperature Control and Humidity
Consistency is key for bakery ingredients. Typically, temperatures should be maintained between 35°F and 40°F (about 1.6°C to 4.4°C). Humidity control is also vital, especially for items like dough that require specific moisture levels. Look for models with adjustable thermostat and humidity controls to customize for your storage needs.
Insulation and Material Quality

Proper insulation ensures energy efficiency and stable internal temperatures. Look for coolers with thick polyurethane or polystyrene insulation. Shell materials should be durable and easy to clean—stainless steel interiors are a popular choice due to their sanitation benefits.
Lighting and Shelving

Good lighting helps you quickly identify ingredients and reduces errors. LED lighting is energy-efficient and provides bright, even illumination. Adjustable shelving allows for flexible organization, which is particularly useful for bakery ingredients that come in different sizes.
Energy Efficiency and Compliance
Opt for energy-efficient compressors and fans to save on utility bills. Ensure your cooler complies with local safety standards and energy ratings to avoid future penalties and to promote environmentally friendly operations.
Building or Upgrading Your Walk-In Cooler: Step-by-Step

Whether you’re creating a walk-in cooler from scratch or renovating an existing one, proper planning and execution are essential. Here’s a step-by-step guide to walk you through the process:
Step 1: Assess Your Needs

Start by analyzing your current storage volume and future growth plans. Make a list of ingredients and products you’ll need to store, and estimate size requirements accordingly.
Step 2: Design Your Space
Work with refrigeration specialists to design a layout that maximizes space efficiency. Consider access points, door placement, shelving arrangements, and electrical wiring.
Step 3: Choose Quality Equipment
Select refrigeration units, shelving, and lighting based on your specifications. Prioritize energy-efficient models with good insulation.
Step 4: Installation

Professional installation is crucial. Ensure the cooler is level, sealed properly, and meets all safety standards. Proper insulation and vapor barriers are vital to prevent condensation and energy loss.
Step 5: Testing and Calibration

After setup, thoroughly test temperature and humidity controls. Make adjustments as needed and monitor the system for the first few weeks to ensure stability.
Maintenance Tips for Your Bakery Walk-In Cooler
Once your cooler is operational, routine maintenance keeps it running smoothly and extends its lifespan. Here are some tips:
- Clean evaporator and condenser coils regularly to prevent dust buildup.
- Check door seals and gaskets for leaks, replacing them if worn out.
- Monitor temperature and humidity daily to catch issues early.
- Schedule professional inspections at least once a year.
- Keep the interior clean with food-safe disinfectants to prevent mold and bacteria growth.
Cost Considerations and Budgeting

Investing in a high-quality walk-in cooler is vital, but it can also be a significant expense. The cost varies depending on size, features, and whether you’re building from scratch or upgrading. Generally, a basic custom unit can cost between $5,000 and $15,000, including installation. Larger or more complex systems may go higher.
While upfront costs might seem high, remember that energy-efficient designs reduce long-term expenses. Proper maintenance and periodic upgrades also ensure your cooler continues serving your bakery well for years.
Conclusion
Creating the perfect walk-in cooler for your bakery is an investment that pays off in quality, efficiency, and food safety. By understanding your needs, selecting the right features, and following professional installation and maintenance practices, you can build a storage solution that supports your bakery’s growth and success. Don’t underestimate the power of a well-designed refrigeration system — it’s the backbone of a thriving bakery operation.
—
#BakeryColdStorage #WalkInCooler #BakeryEquipment #FoodSafety #BakingBusiness #KitchenUpgrade #RefrigerationSolutions #BakeryLife #EfficientStorage #FoodStorageIdeas
Feel free to share your experiences or ask questions about bakery refrigeration in the comments below! Whether you’re starting fresh or upgrading your existing cooler, the right choices will make your bakery shine.